
DIY: Brewing Herbal Floral Water
(Scroll down to view a video version of these instructions)
Growing up, I always adored shelves filled with bottles of potions, lotions and brews. I’ve always been drawn to cabinets lined with jars of herbs, colorful glass bottles, cork stoppers and wooden spoons. Now I am the proud owner of many of these things and there is nothing I enjoy more than creating a new home brew on a rainy Sunday morning.
On this drizzly Sunday morning, I bring you a recipe for a fragrant and oh-so-useful herbal floral water. This water can be used alone as a facial toner, astringent or aftershave, or mixed with additional ingredients to create customized, all natural skin care products.
I like to use the following herbs for my herbal floral water:
- 3 parts Calendula Flowers – natural acne healing and prevention, good for oily, blemish prone, combination and normal skin types
- 2 parts Chamomile Flowers – soothing for acne and blemishes, good for all skin types
- 1 part Yarrow – soothing for acne and blemishes, good for oily, blemish prone, combination and normal skin types
- 1 part Rosemary – especially good for oily and combination skin
- 1 part Sage – especially good for oily and combination skin
- 1 part Lemon Balm – especially good for normal skin types
- 1 part Rose Petals – any skin type, especially good for dry skin
- 1/2 part Comfrey Root – soothing and healing for acne and blemishes, good for all skin types
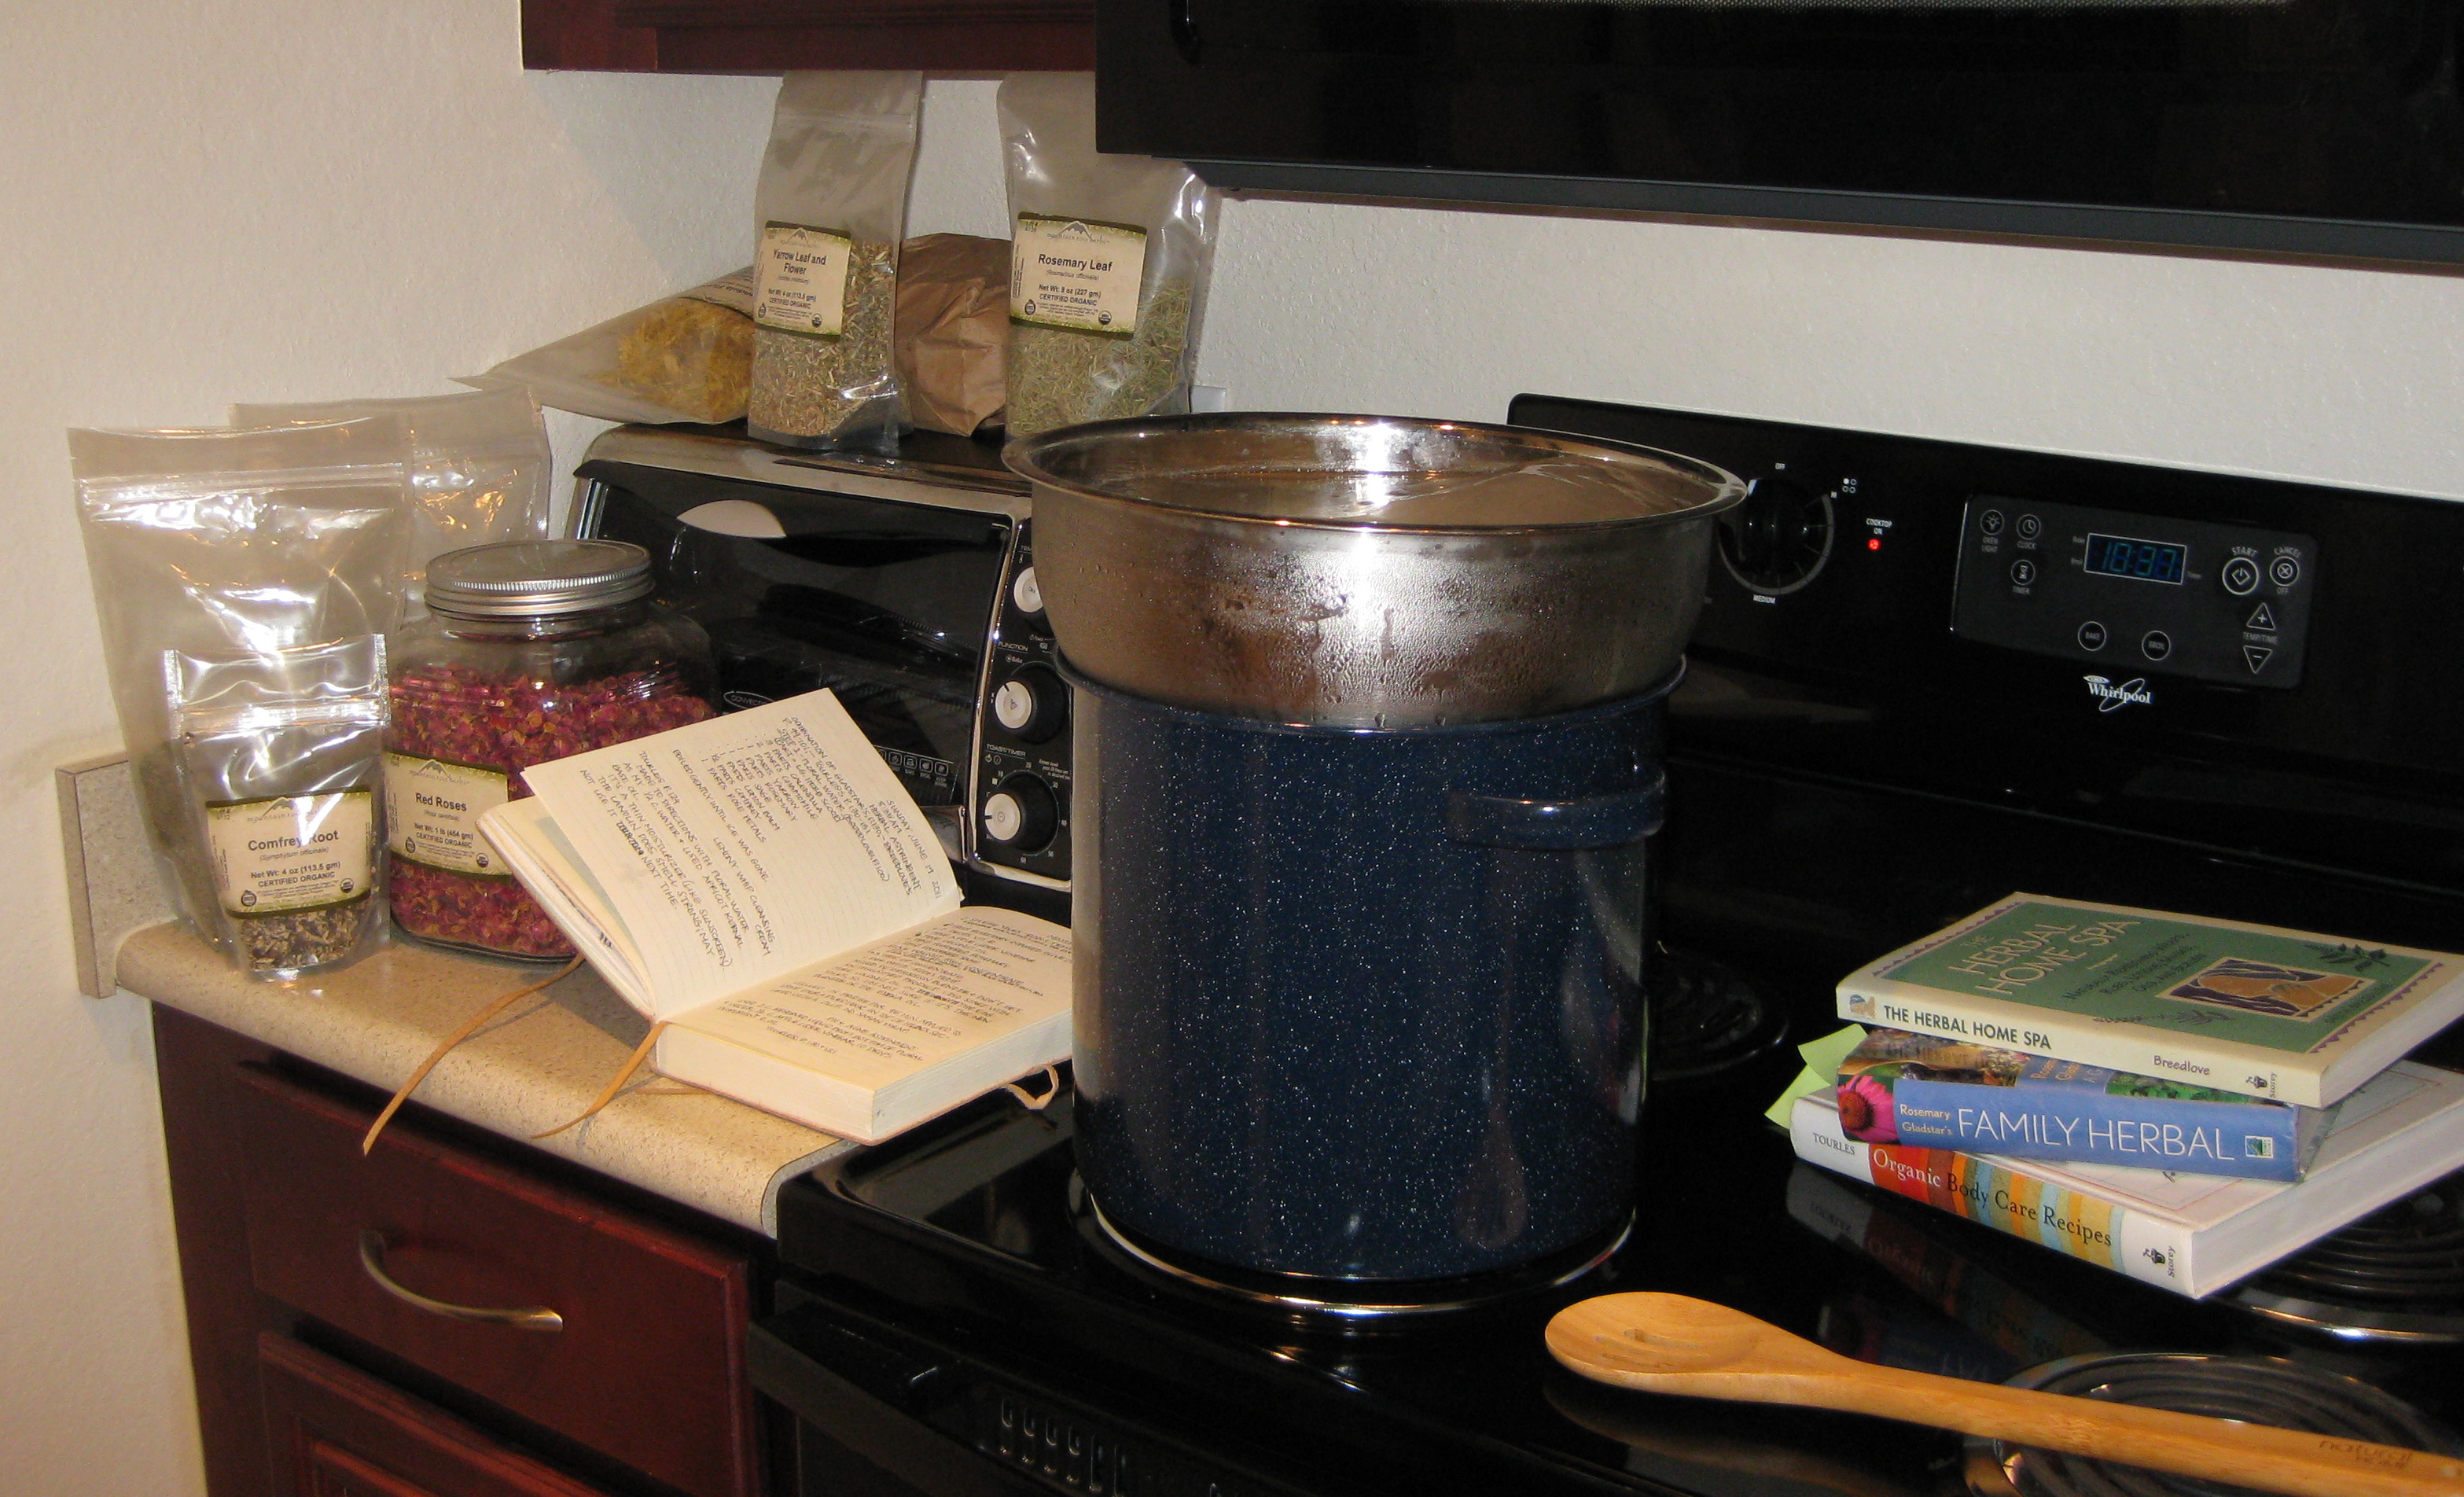
Here’s what you’ll need:
You’ll need to create a “still” using household and kitchen items that you may already have. It seems complex at first, but you’ll find it quite easy to assemble and use this system time and time again.
- a large/tall pot (without non-stick coating)
- a clean, sanitized brick*
- a small glass bowl (this bowl will need to fit inside of the pot, with about an inch of clearance from the edge, all the way around)
- a large stainless-steel bowl (this bowl will need to fit on top of the pot) filled with tap water, then frozen solid
- distilled water (approx. 4-5 cups depending on the size of your pot)
- fragrant, dried herbs or flowers (approx. 2-3 cups depending on the size of your pot)
- turkey baster (optional)
*Soak the brick in a 10 parts water to 1 part bleach solution for a minimum of 4 hours after each use to sanitize and cleanse it.
Brewing Instructions:
You can start this brew when you’re planning on baking in the kitchen for a couple of hours, or if you’re just spending a cozy afternoon at home curled up with a book. Your house will fill with the wonderful fragrance of your simmering herbs.
- Place the pot on the stove, then place the brick in the center of the pot.
- Carefully start to add your mix of dried herbs around the base of the brick. Do not fill more than 3/4 of the way up the brick’s sides.
- Pour distilled water over the herbs until it reaches the top of the brick. Do not cover the brick. If the herbs are floating, use a spoon to push them into the water so they absorb it and sink.
- Wipe excess herbs off of the top of the brick and place the small glass bowl on the brick, centered in the pot.
- Place the large stainless-steel bowl (with frozen ice block) on top of the pot. This will “seal” the pot.
- Turn the burner onto its lowest setting, creating a gentle simmer.
Don’t throw away that leftover water and herb mix! Use it to create an apple cider or alcohol based facial toner, like the one below. The spent herbs can be tossed into the garden or compost pile.
Additional Uses: pH Balancing Toner for Combination and Acne Prone Skin
Trusted Herb Suppliers: If you don’t have access to your own homegrown or local herbs, either of these retailers can provide good quality, fairly priced herbs. Leaves and Roots, Mountain Rose Herbs
Video tutorial demonstrating the steps above using different herbs: DIY Brewing Herbal Floral Waters
this is so cool- I have everything but the calendula!
I’m so glad you like it! You can skip the calendula if you can’t find any. It is great for preventing and healing blemishes, which is why I prefer it. My skin tries to revolt every now and then and I keep it in check with the calendula!
I made the flower water and toner, as I was looking for a cheaper solution to some of the crazy product they sell me every time I get a facial. I love the toner, but and not really sure what to do with the flower water- it seems to have the same use. Can you recommend some other uses?
Can I use the dark water for lotions?
You can but I suggest that you don’t only because the dark water is brewed with the herbs directly in it. No matter how well you strain it, there will always be bits of herbs in the dark water. Once mixed into a lotion, they can create the perfect environment for bacterial growth. If you want to use the dark water in a lotion, then I suggest you keep your final product in the refrigerator to help prevent bacteria and mold growth. I’m not sure if you’re using one of my lotion recipes or one of your own, but I would increase the amount of vitamin E in the recipe because it acts as preservative. I’d still keep it in the fridge though. Also, the reason you can use the dark water for a toner that is not refrigerated, is because the apple cider vinegar acts as a preservative and prevents bacteria and mold growth. Hope that helps, let me know if you have any other questions!
That does help tremendously, thank you! Im not sure what Im going to do with it, I made the lavender chamomile lotion from your blog, and it is heaven on my and my kids eczema ridden skin. I was thinking to use the dark water to make a couple more batches of lotion to give away in the 4 oz tins but that might not be such a great idea if it’ll spoil that quickly… Any ideas what to do with it?
I’m so glad you like it! That is one of all-time favorite lotion recipes. To be honest, most people toss the dark water but I try very hard not to waste anything, so it’s difficult for me to just toss it. You can make it into a facial toner (here’s the recipe: http://katienormalgirl.com/2011/10/04/homemade-easy-ph-balancing-facial-toner/). Or you can put it in a spray bottle (store it in the refrigerator) and spritz it in outdoor seating areas to help repel bugs. Be careful not to spray it directly on light colored fabrics because it might stain them. I’ll keep thinking about it and see if I can come up with some other uses. I’m so glad you gave this a try and like it! 🙂
I just received a comment from one of my readers and she mentioned facial saunas and it gave me another idea for your dark water…a facial steam! Wash your face and apply a facial toner of your choice, but no moisturizer…yet. Bring the dark water to a boil with a lid on top (you don’t want all of that lovely steam escaping!). Get a large towel that you can drape over yourself and the pot of hot water (which you can pour into a wide bowl if you prefer), then create a tent with the towel as you lean over the steamy water. Allow the steam to waft over your face and fill your towel tent for about 10-15 minutes. Then rinse your face with cool water and apply your favorite moisturizer. The lavender and chamomile will soften your skin and help shrink your pores!
Thank you! Everybody I’ve given the lotion to absolutely loves it, now I want to work on the honey rose and apple lotion- instead of dried apples, can I use fresh green apples for the distillate? P.s. I have bottled the dark water, for future facial saunas, haven’t tried it yet 😉
I’m so glad they like the lotion! In October I start making batches of the stuff for gifts during the holidays. 🙂
You can definitely use fresh apples. I’ve noticed that there is more apple scent when I use the dried but you should still get a wonderful smell from the fresh. I’ve only used Fugi apples fresh, but I don’t see why the green ones wouldn’t work. Will you let me know how the scent turns out? And you’ll have to let me know how that facial sauna goes!
Hi Katie, I bought a facial sauna that I plan on using with some herbs, and since I’ve seen you use distilled water on your herbal preparations I was wondering if you would recommend using it for this purpose too. Thanks! I love your posts by the way 🙂
Hi Sofia! I would definitely recommend distilled water for this. It is better for your pores and the facial sauna itself. Filtered water may still contain calcium, which can build-up in the machine, eventually leaving calcium deposits. If you’ve ever seen those small tabletop fountains with white build-up, that’s what I’m talking about. I’d love to hear what combination of herbs you’re using. I always like to hear what people like.
I’m so glad you enjoy my posts and thanks for stopping by!
Does the type of brick used matter? Is there a possible problem with lead being leached from the brick into the herb water?
I use a clay brick that hasn’t been treated with an sealants or paint. I researched this a couple of years ago because I too, was concerned! I found that unless they had been painted with a lead based paint at some point then there wasn’t any risk of lead in the brick. If you prefer, you can use a small clay baking dish that is rated for oven use, just don’t use glass because it can get too hot in direct contact with the bottom of the pot. Hot glass can explode…which I found out the hard way, luckily no one was hurt.
Thanks, I know not to used a treated or painted brick, but was concerned because some clays have lead naturally occuring in them. That is one of the many reasons people shouldn’t eat clay (picca), or use foriegn made pottery for food unless specified lead free. I’ll use a plain brick, and likely be safer than most commercially prepared products.
I’m trying to figure out what you mean by “3 parts” or “1 part” herbs? Help?
It used to drive me bonkers when people measured things in parts, I used to think “just give me a measurement!” 🙂 Now look at me doing it too! I said to use “parts” because your pot may be larger or smaller than mine, so in the end you’ll want to have about 2-3 cups (I know…still not exact but stick with me for a minute) of dried herbs. I would start with 2 cups and pour them into the pot around the brick and see how far up the sides of the brick they go. If they barely line the bottom of the pot, add another cup.
Back to the “parts” part of it. All you have to do is pick a measurement size and use it the whole time. So if you start with a tablespoon, then you can replace the word “part” with “tablespoon”. According to my recipe above, you’ll end up with 10 1/2 tablespoons (parts) which is less than a cup (because 16 tbsp = 1 cup) so you would add another round of herbs…maybe even two more rounds. Overall, the goal is to use the same measuring implement, whether it is a tablespoon or just a scoop that you have for the entire measuring process. I hope that clears it up a little and if you’re still not sure or if you have other questions, please don’t hesitate to ask!
Got it 😛 Thanks for explaining.
What else besides toner and cream can you use these floral waters for?
It depends on the mixture of herbs that you use. If you’re using the herbs above, you can use it for a facial steam (if you scroll up in the comments to July 6th, I posted more information about this, it was a bit long to repost. 🙂 ) Again, depending on the combination of herbs you use, like if you make a batch of lavender and chamomile, you could keep in in a spritz bottle and spray your pillow every evening before you go to bed and the scent will help calm your nerves. It’s also a great room freshener…chemical-free, of course! I’ll keep thinking on it and see if I come up with anything else!
I really like your info and style of making lotions. If i wanted to sell my lotion do i need a preservative? How long will the lotion last sitting out? Thanks, Cheryl
After checking out a few of the blog posts on your site, I really like your technique of blogging.
I book marked it to my bookmark website list and will be checking back in the near
future. Please check out my website as well and tell me what you think.
Have you ever considered creating an e-book or guest authoring on
other sites? I have a blog based upon on the same ideas you
discuss and would really like to have you share some stories/information.
I know my viewers would value your work. If
you are even remotely interested, feel free to send me an e mail.