Tag: tips

Rosemary, Part I: Cultivation

HERB PROFILE OF THE MONTH
CULTIVATION  |  CULINARY  |  HERBALISM

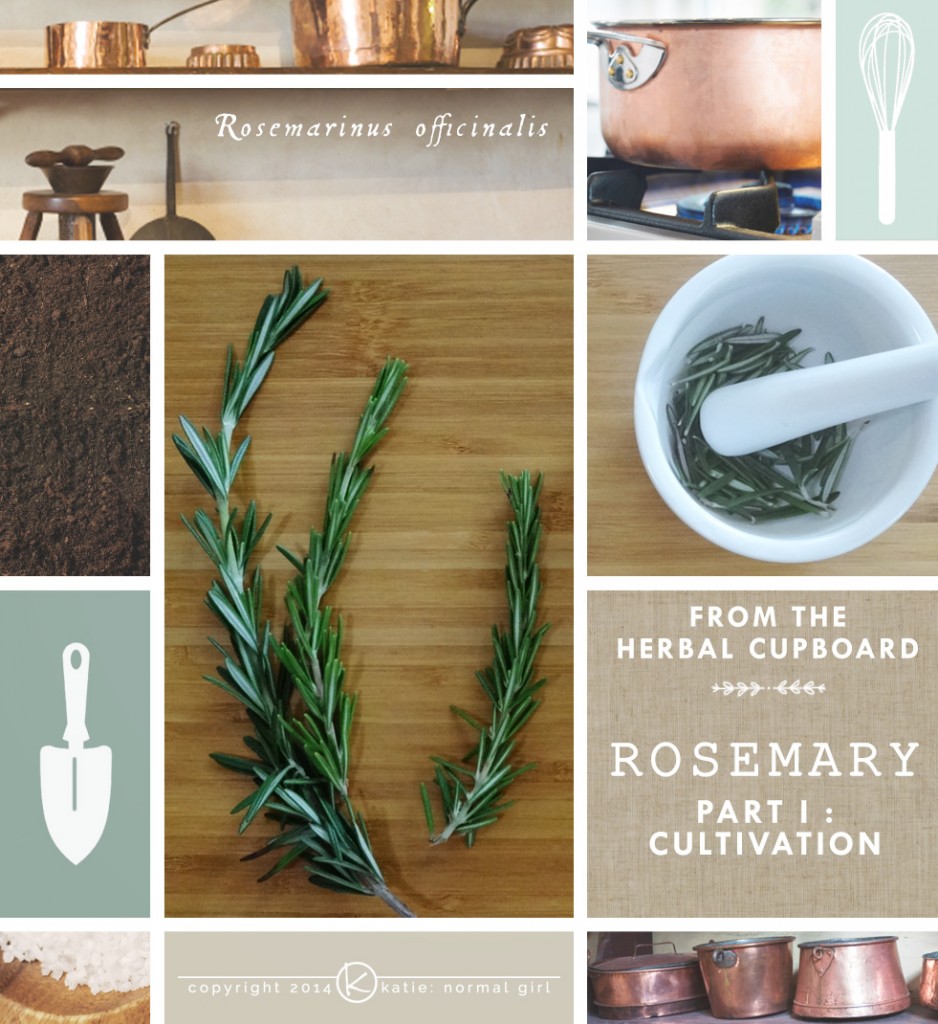
Featured Herb-Rosemary - grow it, cook with it and use it medicinally from katienormalgirl.com | #Cultivation

Rosemary is one of those fabulous herbs that is pungently fragrant and has a multitude of uses. It’s also very pretty to look at with tiny, thin leaves on sturdy woody stems, which makes some varieties great for shaping into tiny topiaries. Other varieties tend to stay low and stretch along the ground, making them perfect ground covers.

PLANT  |  GROW  |  HARVEST

Rosemary likes full sun and a quick-draining soil – indoors or out, in a pot or in the ground, this is what it needs. In warmer climates Rosemary can be grown outdoors as an evergreen shrub. In cooler climates, you’ll need to take it inside when winter sets in and frost is immanent.

In dryer climates start with a soil-based compost and bark to ensure that the soil remains damp but not wet – rosemary hates wet feet. In a humid climate, start with a soil-based compost and add a bit of sand to encourage quick drainage.

When planting rosemary in a pot, an uncoated terra cot pot is best. This will allow water and moisture to drain from the bottom and through the container’s permeable sides.

Rosemary can easily be grown from cuttings. Start them in spring or summer to give them enough time to develop before the cooler weather arrives.
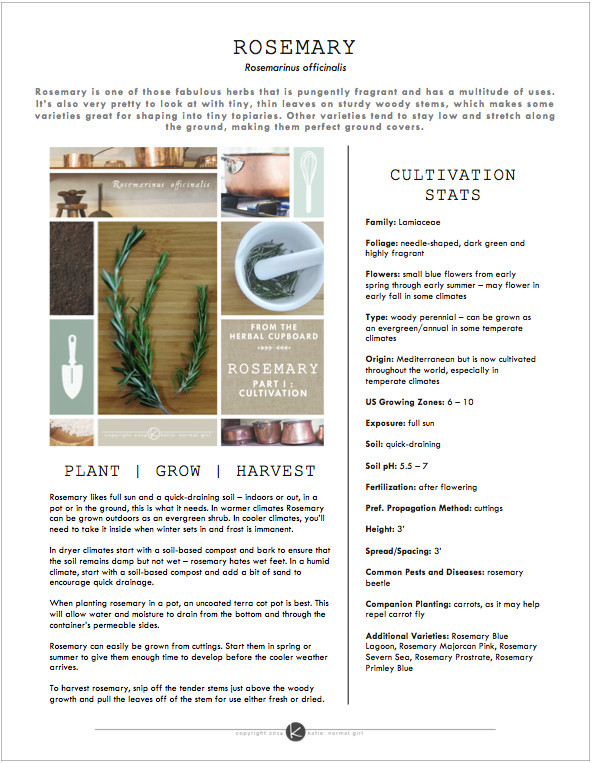
Rosemary herb profile sample - original PDF available in the Download Gallery from katienormalgirl.comTo harvest rosemary, snip off the tender stems just above the woody growth and pull the leaves off of the stem for use either fresh or dried.

Grab a PDF of this info along with more cultivation stats (including pH, additional varieties, companion planting, and more) from the Herb Library in the Download Gallery.

Part II: Culinary – coming June 11
Part III: Herbalism – coming June 18

Whatta think? Will you give growing rosemary a try?

katie: normal girl

Host a Craft-ernoon Party

Valentines Glitter Jars from katienormalgirl.com | #valentinesday #crafts

Today I’m a guest blogger over on Oak & Oats where I’m sharing tips for hosting a craft-ernoon party. I love to host a good party filled with food, crafts and glitter. If you’d like to make these glitter jars and host a party of your own, hop on over and check out this Valentine’s Day craft!

katie: normal girl

DIY Sugar Shapes

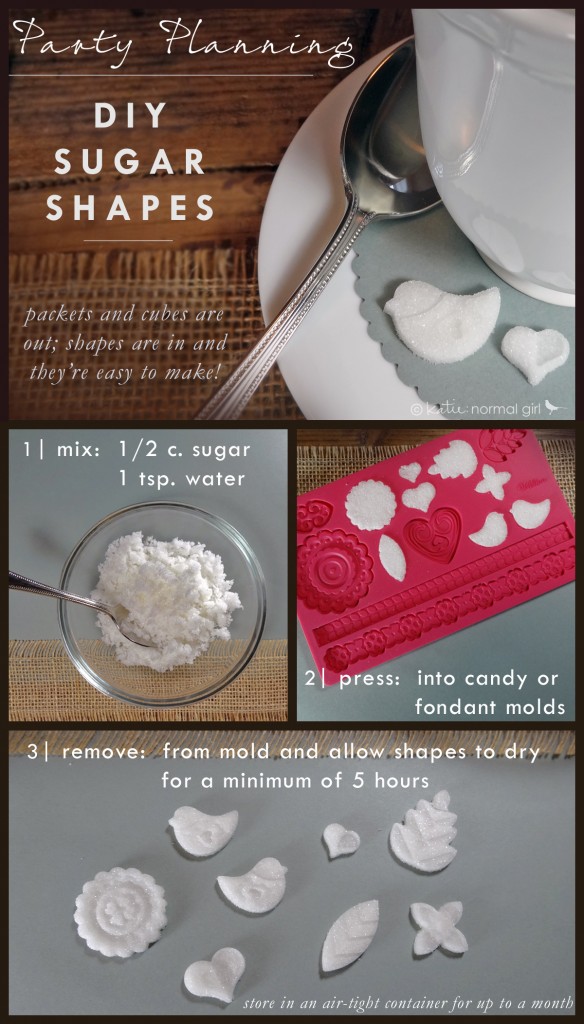
Just in time for National Hot Tea Month, DIY Sugar Shapes from katienormalgirl.com #diy #partyplanning #teaJust in time for National Hot Tea Month, sugar shapes! These fun little guys are a cinch to make and are great fun for a party or as a special treat for yourself.

Here’s a few extra tips to get you started:

  • If you want to add coloring to your sugar shapes, add a few drops of food color in your teaspoon, then fill the rest of the spoon with plain water and mix with the sugar.
  • When selecting a mold, be sure to select one that will make shapes that aren’t too large so you don’t end up with shapes that are three tablespoons of sugar each! Also be careful to select a mold that isn’t too shallow or your shapes may break easily.
  • It is a small amount of liquid and doesn’t seem like enough to wet all of the sugar but just keep working at it and it will all come together. In the end you’ll have a relatively dry mixture that presses into the mold really well.
  • After pressing the sugar into the mold, use the back of a knife to flatten the shapes.
  • The consistency of the mixture is the right combination of dry and wet that you only need to leave the sugar in the mold for a few minutes. If you have really shallow molds (not recommended but it certainly can’t hurt to try) I’d leave them in there for about 10-15 minutes before removing from the mold.
  • To get the shapes out, place a flat, rigid surface (like a small cookie sheet or I used a book with foil wrapped around it) on the top of the mold and flip the whole thing over. That way you’re not try to do the quick-flip-slam onto a counter top.

Have a good time making these and stop by for more tea bits all month long!

katie: normal girl


P.S. This is also a great way to make snow for a gingerbread house!

Candy-Dipped Apple Sundae Bar

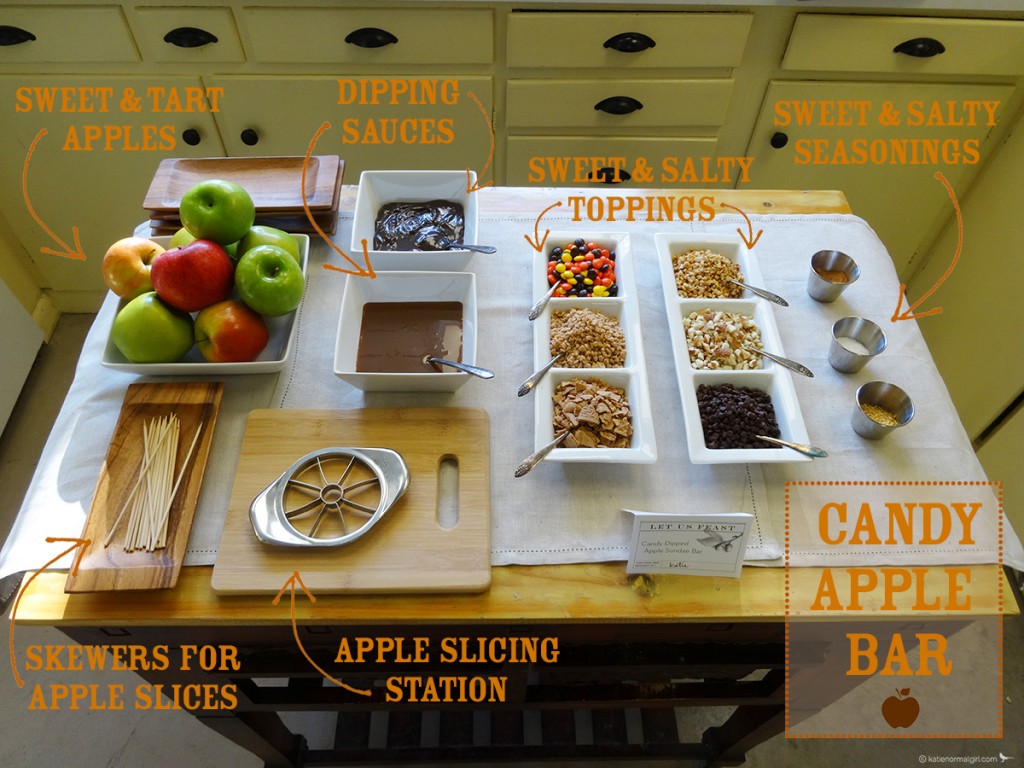
Candy Dipped Apple Bar from katienormalgirl.com  #dessert #autumn #partyplanning #thanksgiving

This is my favorite new Fall dessert! It’s the perfect communal dessert for parties, with or without kiddos. And, oh the varieties of yummy-ness that you and your guests can create!

I provided chocolate fudge and caramel sauce to dip the apples into, then I provided a variety of sweet and salty topping choices. For a final bit of yummy, I also set provided small containers of sea salt, pumpkin spice, and dried orange peel. If you’d prefer to serve something with less sugar, you can go healthy and provide warm peanut butter or honey for dipping instead of caramel and chocolate and swap the candy for dried fruit and granola. The possibilities are endless!

Toppings for Candy Apple Sundae Bar from katienormalgirl.com  #dessert #autumn #partyplanning #thanksgiving

Here’s a list of what I provided:

Hat Trick: Staying Safe in the Summer Sun

Wear a Hat in the Sun from katienormalgirl.comSummer is officially underway! It’s time to get outside for picnics, beach trips or just sitting in the park, sipping on sun tea and reading this summer’s best-seller.

When you’re making your way out the door this summer, don’t forget your hat. It’s one of the easiest (and in my opinion, most fashionable) ways to stay safe in the sun. But how does it actually help, you may wonder?

Beauty Bits: Applying Eye Moisturizer

Tips for applying eye moisturizer from katienormalgirl.com

The skin around your eyes is thin and very delicate.  It must be treated with a gentle touch and great care.  That being said, any time you’re applying creams, lotions or oils around the eyes, be sure to use your ring finger to do the spreading.  It is your weakest finger and will deter you from pressing too hard.

Calming Oatmeal Facial

Original publish date: January 19, 2012

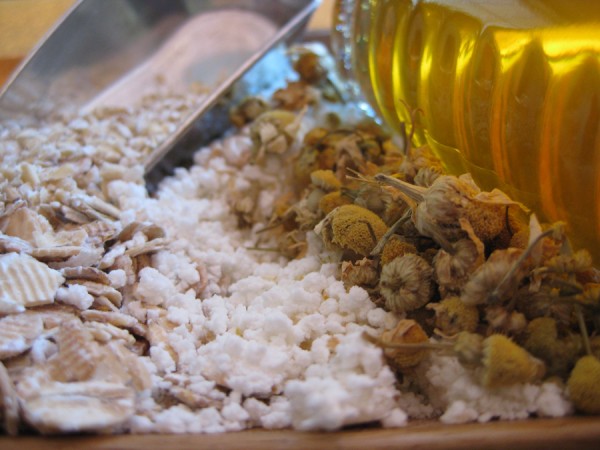
DIY Skin Care: Calming Oatmeal Facial from katienormalgirl.com | #DIY #natural #beautyLast nerve frayed?  Winter weather dried out your skin?  No problem.  The chamomile in this mask has natural anti-inflammatory properties that will ease your nerves.  The honey is a natural humectant, pulling moisture from the air and drawing it to your skin.  It will leave you feeling calm and moisturized, and who wouldn’t want that?

You’ll need:
2 1/2 tsp. powdered milk
2 tsp. ground oatmeal
1 tsp. honey
2 chamomile tea bags

Brew…
Place the chamomile tea bags in your favorite mug and pour in 1 cup boiling water.  Put a saucer over the cup to trap the escaping steam, which is now infused with the beneficial constituents of the chamomile flowers.  Let this steep for 10 minutes.

After the tea is done steeping, remove the tea bags, squeeze out any excess water and place them in the refrigerator to cool.

Mix…
In a small bowl, mix together the powdered milk, ground oatmeal, honey and 2 tsp. of the warm chamomile tea.  The warm water will draw out the beneficial elements of the oatmeal and milk, while liquefying the honey, creating a thin paste.

Relax…
Using your fingers, apply the oatmeal mixture to your forehead, then gently sweep down your temples, under your eyes and around your nose.  Move your fingers in small circles as you apply more mixture to your cheeks, around your mouth and down your neck.

As you apply the mixture, pay attention to your breathing, take slow, calm breaths.  Enjoy the light scent of chamomile and honey as you inhale through your nose and exhale through your mouth.  Feel the warm sensation of the oatmeal mixture as you gently spread it over your face.

When you’ve finished applying the mask, rinse your hands in warm water.  Get the cooled tea bags from the refrigerator, then lie down with the tea bags placed over your closed eyes.  Relax for 20 to 30 minutes and let the chamomile calm your skin and soothe your nerves.

And Rinse.
To rinse the mask off, use warm water and a wash cloth.  You do not need to use soap or a cleanser.  The mask will rinse clean without them and you want to allow the delicate essences of the chamomile flowers to linger on your skin.  The honey will rinse off, leaving your skin feeling moisturized, without clogging your pores.  Pat your face dry.

Dispose of (or compost!) the tea bags and finish your facial by sitting with a good book or magazine and sipping on the rest of the chamomile tea that you brewed earlier.  If you’ve got the ingredients on hand, this entire process takes less than 45 minutes and can really replenish your mind and body after a draining day.

Happy brewing!

katie: normal girl


P.S. Who knew? Tea vs. Tisane
Did you know that in order for a beverage to be called “tea,” it actually needs to have tea leaves in it?  So all of the herbal brews, like the chamomile tea you just made, are not actually teas…they’re tisanes, water infused with herbs.  But seriously, who would ever call them that??  Chamomile tisane?

Gardening Journal: How to Sterilize Clay Pots

Garden Journal: How to Sanitize Clay Pots from katienormalgirl.com | #gardening #tips

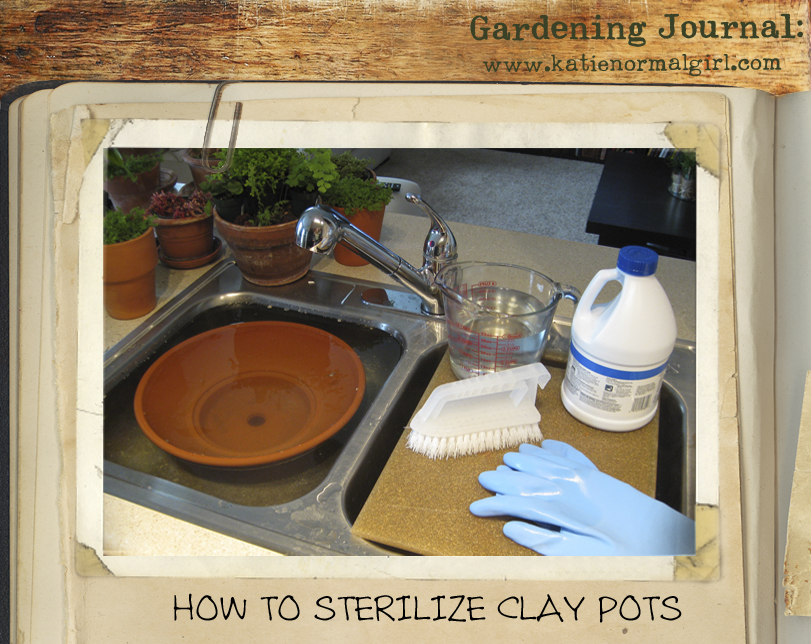
Materials Needed: bleach or hydrogen peroxide, scrub brush, rubber gloves

I have always loved the look of mold and calcium buildup on my terra cotta pots. Unfortunately that wonderful patina can mean unsanitary growing conditions for your potted plants.  Give your plants their best chance for growth by sterilizing your clay and terra cotta pots before you plant.  This easy process will help eliminate the possibility of fungal or bacterial diseases that may develop.

Soak the pot(s) in a  solution of ten parts water to one part bleach or hydrogen peroxide.  I like to use my kitchen sink but you can use a plastic bucket or basin.  Allow the pots to soak for a minimum of 3 hours or you can leave them in the solution overnight if you prefer.  After the pots have soaked, put on your rubber gloves and use a stiff bristled scrub brush to thoroughly scour the pot, inside and out.  Rinse the pot and allow it to dry.

Your pots are now ready, and your new plants will have a great growing season!

katie: normal girl