
 I found these fun glasses at a thrift store recently and decided that with a little bit of shine, they would make perfect little flower vases. I just can’t resist fresh cut flowers at the farmer’s market so I’m always in need of a vase or two.
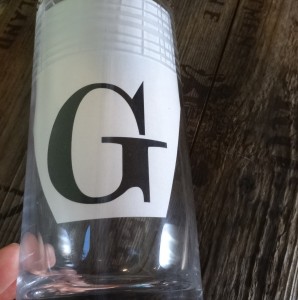
The glasses already had a great etched pattern on them so I just added bits of gold trim and a gold-leafed “G”. The whole process was a lot easier than you might think.
Supplies Needed:
- three tall glasses
- gold trim in several sizes and/or shapes (I used these
)
- decoupage adhesive/sealant, like Mod Podge
- 2 foam craft brushes
- permanent marker (fine tip)
- gold-leaf
- leafing adhesive (Preferably a pen, I used this one
)
- soft-bristled paint brush
Start by washing and drying the glasses. I applied the gold-leafed monogram first, so it would be protected under a layer of the decoupage sealant. Either free-hand, or trace, your letter onto the glass using a fine-tipped permanent marker. If you want to trace a letter, print it to the desired size and tape it to the inside of the glass, then trace away!
If you’re unhappy with the letter placement or if you have stray marks on the glass, you can use acetone to remove the permeant marker. Acetone can be purchased in drug stores in the nail care aisle (it’s often the active ingredient in nail polish remover).
Use the gold-leaf adhesive pen to carefully apply glue to the letter. Allow it to become tacky (about 10-15 minutes) and carefully lay a sheet of gold-leaf over the glue. Use the soft-bristled brush to gently push the leaf onto the adhesive. Let it sit for 5-10 minutes, then use the soft-bristled brush to gently start brushing off any excess gold leafing. You can save these gold flakes for another crafting project. They make great bits of glitter and sparkle.
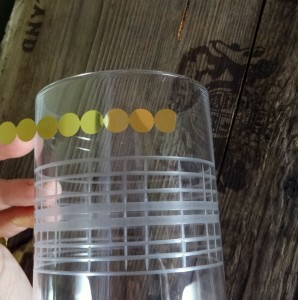 Now that your glass has been monogrammed, you’ll want to apply the gold trim. Tape the trim to the glass to test different patterns and layouts. Once you’ve found one that you like, take a picture for reference. Remove all of the trim and tape from the glass and use your foam craft brush and decoupage adhesive/sealant to apply the trim permanently. Each decoupage adhesive is a little different so follow the directions on the bottle that you purchased.
Once you’ve applied the trim, allow it to dry completely. Use the decoupage and a foam craft brush to seal the trim and monogrammed letter by applying a thin layer of decoupage over the entire glass. Allow it to dry and you’re all set! Your new vases will need to be hand-washed using a gentle cloth. Try not to scrub them too vigorously, a gentle swipe and pat dry will do.
I hope you’ll give this a try!
What a cute idea! I never thought of using gold leafing on vases!
Lauren@cornwellfam.com
It was a bit serendipitous actually. I was working on another project that needed the gold-leaf so it was still on my craft table and I figured, why not? Thanks for stopping by!
These look awesome! The gold trim is a great addition